

Operate the BB-FWEIDE525D-D1 CD/DVD Duplicator
Control Panel:
Mode
(Write Speed) LED
Writing Progress LED


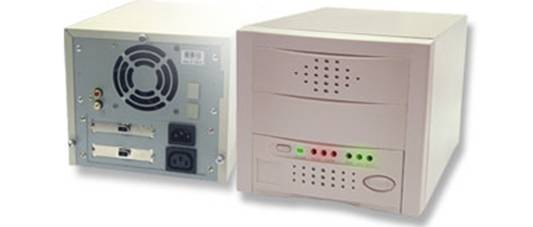
Mode Selection button Failed LED
Mode Selection:
Press the “Mode Selection” button to choose one of the writing speeds. The “Write speed LED” (green, orange, or red) is to indicate what speed is selected.
|
Mode LED |
Write Speed |
Remark |
|
Green |
Full Speed |
Definition of the full Speed:
|
|
Orange |
Half of full speed |
Definition of the half of full
speed: |
|
Red |
Low speed |
DVD±R/RW is 1X. CD-R/RW is 4X. |
|
OFF |
Erase disc and Simulation |
If DVD±R/RW discs are blank discs, it will do simulation. If DVD±RW discs are not blank discs, it will erase discs. |
Writing Progress LEDs:
This row of green LED lights is as indicators for DVD duplication progress in percentage. Users can know how much the process is completed.
|
Writing progress |
Remark |
|
○ ○ ○ |
No duplicating process in progress. |
|
★ ○ ○ |
0% to 33% |
|
● ★ ○ |
33% to 66% duplicating process completed. |
|
● ● ★ |
66% to 100% duplicating process completed. |
|
● ● ● |
Duplication completed and successful. |
○ : LED is off. ●: LED is on. ★: LED is blinking.
Failed LEDs:
This row of red LED lights is as indicators for DVD duplication failure. Users can know why the duplication failed.
|
Failed LEDs |
Remark |
|
○ ○ ○ |
No errors. |
|
● ○ ○ |
DVD-ROM read failed. |
|
○ ● ○ |
DVD±R/RW write failed. |
|
● ● ○ |
Simulation fail. |
|
○ ○ ● |
Source disc is with copyright protection. CSS\CPPM\CPRM protection on the source disc. |
|
● ○ ● |
Target medium error: § Non-writable Media. (Target disc is DVD-ROM) § Media disk type error. (Source disc is DVD but target disc is CD-R) § Source disc can be copied by target drive. (9.4GB double layer DVD) |
|
○ ● ● |
Medium capacity error: The number of data sectors in the source medium is greater than the total number of the data sectors in the target medium. For example, a full DVD-R disc (2,298,496 sectors, source medium) is copied to a DVD+R disc (2,295,104 sectors, target medium).
|
|
● ● ● |
Reserve |
○ : LED is off ● : LED is on
STOP Button:
Press the source drive eject button to cancel the process.
Connect the power cord to the duplicator. (Note: no need to connect to PC). Turn on the power at the front panel. After the 30-second self-diagnostics, the Mode LED will show in green color to indicate the stand-alone duplication mode. If the source or the target drive is with a medium, the tray will be ejected automatically.
Step 2: Place the master disc in the DVD-ROM drive.
1. Press the “eject button” to eject the DVD-ROM tray.
2. Place the master disc onto the DVD-ROM drive.
3. Press the “eject button” again to close the DVD-ROM tray.
Step 3: Place the blank DVD±R/RW disc in DVD±R/RW drive.
1. Press the “eject” button to eject the DVD±R/RW tray.
2. Place the blank disc onto the DVD±R/RW drive.
3. Press the “eject” button again to close the DVD±R/RW tray.
Step 4: The duplication will start automatically.
After placing the discs in DVD-ROM and DVD±R/RW drives and closing the trays, the duplicating process will start immediately. The Writing Progress LEDs will now show the progress of the duplication in percentage.
Step 5: The duplication is completed.
If the three Writing Progress LEDs are on and in green, it indicates that the duplication is completed successfully.